


Happy Birthday Mom

Good morning, how are you doing ?
Next Sunday, May 29, will be Mother's Day. For all those who are moms, I know you love it when your child gives you a gift and love!
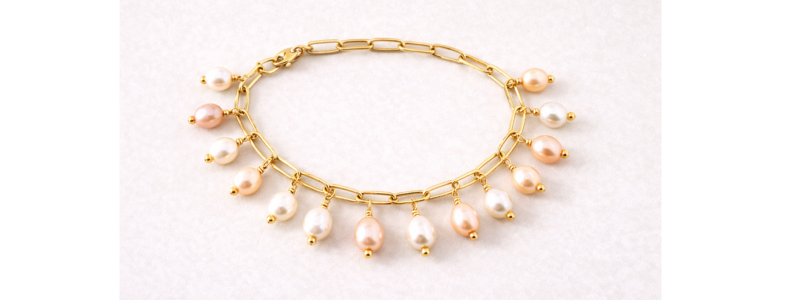
I created, for you ladies, a pretty, cute necklace with a shell. Bring your ear closer to it, it seems you can hear the sound of the sea 😃
Step 1: What are the supplies?

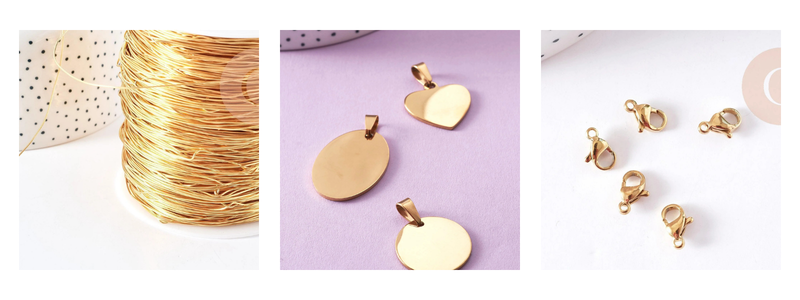
In this tutorial, you will need several things. Take your usual pliers (flat pliers, cutting pliers and conical pliers), glue and the supplies above:
- gold wire: fine enough to enter small freshwater pearls
- white freshwater pearls *
- faceted golden beads*
- fancy beads
- small pearls
- rectangular mother-of-pearl*
- an enameled chain *
- a simple golden chain , small links*
- a gold cabochon support and a quartz cabochon*
- a shell*
- large rings*
- very small rings*
- 2 clasps: one large and one small*
- 2 chain links*
2nd step :
Take your 2 clasps, your two chain links (or medium sized soldered rings). As shown in the photo, attach your two clasps to each side of the enameled chain *. I'll give you the link for opening and closing a ring: here .

Step 3: make the little bead and stone paths
Cut pieces of cabled wire, so you can start our little ends.
Take your conical pliers and your gold wire. Start by forming a loop with your pliers.

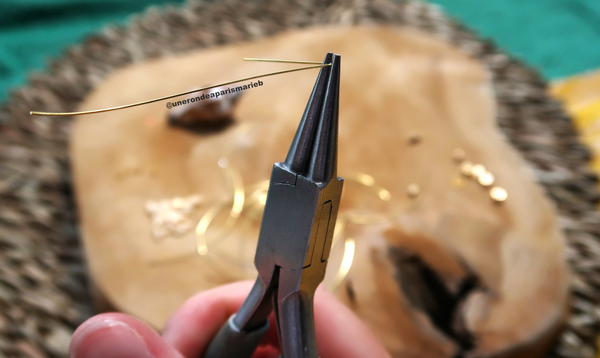
Turn the wire to the right of the pliers, passing it over the large wire; to finish forming the loop.

You twist the short wire around the long wire to obtain a pigtail.

Swell your first stone. For my part, I started with a freshwater pearl.

Take your flat pliers, place them - flat - on your loop. Then take another flat pliers. With this, holding your cable wire firmly, go around your loop with it. You will form the second pigtail.

Do the same with the other parts like the photo below:

For your square mother-of-pearl stones, it is safer to put a ring rather than making a pigtail. In addition, it is a fragile stone and the pigtail risks breaking it.
Take a small ring for this action.

You will obtain a small “piece of road” which can also be called “interlayer”. Make 3 for this tutorial. Be careful, they must measure 7 cm each.

Step 4: collar closure embellishment
I decided to dress the back of your neck because having a simple clasp becomes basic. I like originality in my jewelry. Mother's Day needs a little touch of originality
For this clothing, start by taking a piece of cabled thread. Make a loop and thread it onto the welded link or chain located in the clasp (photo at the beginning of part 3).

Form your pigtail using your pliers : flat and conical.

Thread a freshwater pearl and a small round metal bead (or other: not to exceed 5 mm) and make a pigtail again.
Warning : before closing the pigtail, don't forget to incorporate the end of one of your "ends of path" into the loop.

Do the same on the other side, with the other clasp and soldered ring or a link of the chain.

Thread another bead and close your pigtail.
You have finished dressing your back neck. 
Step 5: design of the second chain
I forgot to take a photo of this step. Excuse me ! However, I know you will succeed.
Cut two pieces of small link chain :
- 1 must measure 12.5 cm
- 1 other must measure 10.5 cm
Using a ring, attach these two pieces of chain to each side of the clasps - see the photo above step 4.

Then, take three small rings and follow these actions:
a small ring with one end of chain + end of a piece of path "A" - a second small ring with the other end of the end of path "A" + the end of a piece of path "B" - a third small ring with the other end of the piece of path "B" + the other cut chain.
Your channel is designed!

Step 6: the shell
Take, again, a small ring. Open it and insert it into one of the main rings of a clasp - I advise you to put it in the larger clasp. Put another chain measuring 22 cm (this is what will support the final shell).


Beforehand, you will have glued your cabochon in your support with specific glue for jewelry. Several glues exist on the market. For my part, I use “crystal arldite” which is translucent.
Open a large ring. Then insert your shell and your cabochon inside. Close this ring.


It's high time to tie this seashell on the falling chain . Take a small ring. Open it and insert the end of the chain and the large ring of the shell. Shut it ❣️


I knew you were going to make it. Believe in yourself all the time because for me, I do.
I think your mom will love this jewelry that you are going to give her ❣️I wish you a great day and I will see you soon for a new tutorial.