Good morning, how are you doing ? Here is our last tutorial for May 2022. Here, I have made you a shell bracelet, very good for summer!
Step 1: your supplies
To make this bracelet you will need:
- 1 clip clasp *
- 1 silver shell charm*
- 1 cream satin ribbon*
-square beads*
- round and very small mother-of-pearl beads*
- white round glass beads
- green crystal or fine stones*
- yellow glass beads*
- rings: medium
- tips for the ribbon
- cabled wire and crimp beads
- your pliers , obviously
* products sold on our online store

Step 2: mounting the shell on the ribbon
With the satin ribbon, pass it through the shell like the photo above:

Then with one end of the ribbon, tie a knot by passing this end behind the shell then inside it.

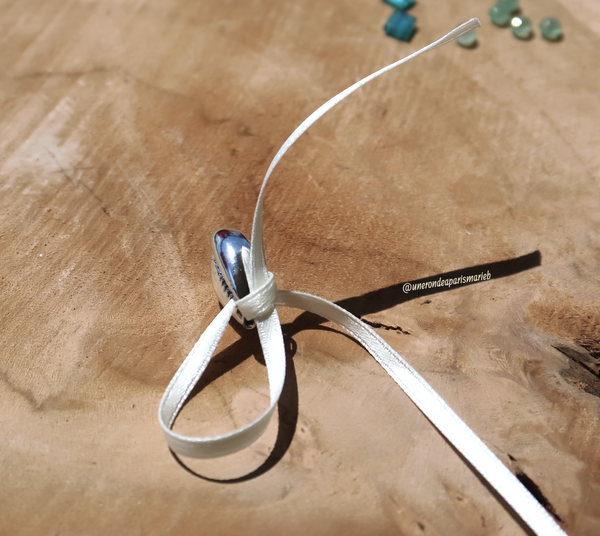
Pull the thread so that it is flat. Do the same with the second side. Follow the gesture carefully with the photos above:


Step 3: put the tips on the tape
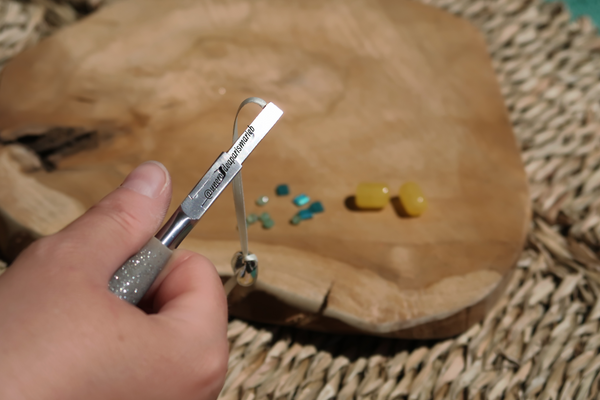
To do this, you must have flat pliers and use a tip of the size and thickness of your ribbon. Take your ribbon, insert it into the tip, at the end of the ribbon. The tape may protrude a little, for a better grip.
Then using your flat pliers, flatten the first side of your tip.


Then, still using your flat pliers, lower the second side of your tip. Press hard to tighten the tip tightly on the ribbon.
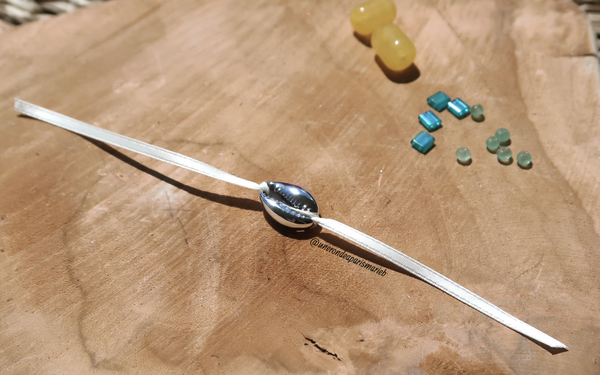
Do the same with the other end of the ribbon.
In total, the ribbon and the shell, the measurement is: 16.5 cm (tip-tip)
Step 4: the other two rows
Forgive me, I only took a photo of one row. The second, you can do it yourself without seeing it. I will show you the photos.
The next two rows should be cast on cabled wire. So you will need crimp beads to close the two pieces.
I'll show you the one with the square beads. For this one, you'll need two wires hardwired. Thread the two wired beads onto the same ring (medium). You can see again, how to put the crush pearls in the previous tutorial:
Ethnic Necklace, multi chains – Gingerlily Perles
Then, string square beads with mother-of-pearl beads and round-shaped gemstones or glass.
In total, the row must be: 15 cm
Step 5: Yellow row
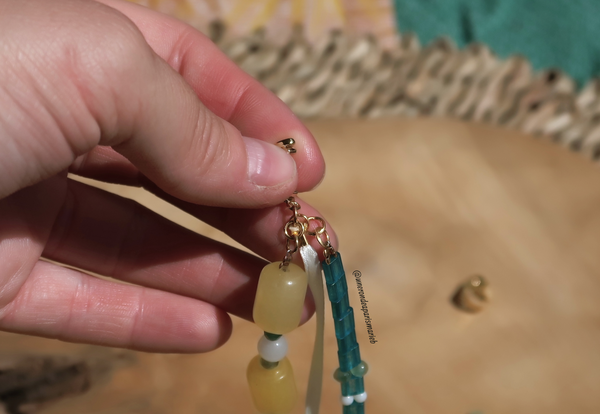
Do the same with the yellow row which should measure 16.5 cm. Thread in this order, for this model:
Yellow pearl - small green pearl - medium white pearl - yellow pearl
You will have to repeat this path 5 times and end with a yellow pearl.
Step 6: mounting on the clasp
As shown in the photo above, start by mounting the “ribbon” row on part of the
clasp . Then the other end on the second part of the clip
clasp .
We will gradually place the other two rows at the level of the central ring of the “ribbon” row.
Place an additional ring on the row with the blue beads. Then another ring on the yellow row.
Step 7: mounting the bracelet
Open your blue row ring and hook it into the central ring of the ribbon, which is attached to the
clasp . Do the same at the other end of the row.
Then, do the same thing with the yellow row as below
On the other side of the
clasp , do the same thing. Open the central ring, insert the other rows from their ring. See the photos below:
And there you have it, you have finished this little summer bracelet which will accompany you during your “playa” evenings. I'll be back very soon with new
tutorials .


